Welcome to the world of DIY jewelry repair! If you’ve ever faced the frustration of a broken clasp on your favorite necklace or bracelet, you’re not alone.
In this comprehensive guide, we’ll delve into the art of fixing a broken clasp, providing you with step-by-step instructions, pro tips, expert insights, and real-life case studies to empower you in reviving your cherished pieces.
| Takeaways |
|---|
| 1. Know Your Clasp: Understand the different types of clasps and the common issues that lead to breakage. |
| 2. Essential Tools: Gather the necessary tools for an effective repair, and choose replacement clasps wisely. |
| 3. Step-by-Step Guide: Follow a systematic approach to assess damage, remove the old clasp, and attach the new one. |
| 4. Pro Tips: Utilize expert tips such as using jewelry glue, reinforcing with jump rings, and adjusting tension for different clasp types. |
| 5. Common Mistakes to Avoid: Be mindful of pitfalls like overlooking small damages, using the wrong clasp, and rushing the repair process. |
| 6. Preventive Measures: Regularly inspect, clean, and lubricate your clasps to prevent issues and ensure longevity. |
| 7. Expert Insights: Seek advice from experienced artisans, and consider reputable replacement clasp brands. |
| 8. Case Studies: Real-life examples demonstrate successful repairs and the strategies employed. |
| 9. FAQs: Address common questions about DIY clasp repairs, including when to seek professional help. |
Understanding Common Clasp Issues
2.1 Identifying Different Types of Clasps
Before we jump into the repair process, let’s take a moment to understand the diverse world of jewelry clasps. From lobster clasps to spring rings, each type comes with its unique set of challenges and solutions.
Discover the art of crafting exquisite jewelry with our tips and tricks. Unleash your creativity, master new techniques, and elevate your DIY jewelry projects to stunning heights.
Table 2.1: Types of Jewelry Clasps and Their Characteristics
| Clasp Type | Characteristics |
|---|---|
| Lobster Clasp | Small, spring-loaded, often oval or lobster-shaped |
| Spring Ring | Circular with a spring-loaded mechanism |
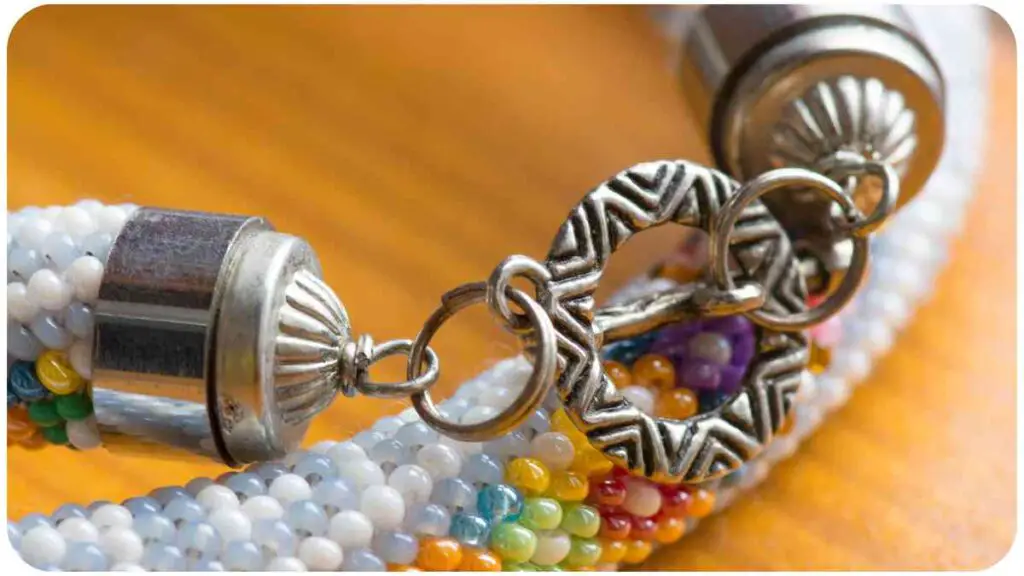
| Toggle Clasp | Two-piece design, one end fits into the other like a toggle switch |
| Magnetic Clasp | Uses magnets for closure, popular for ease of use |
2.2 Causes of Clasp Breakage

Understanding why clasps break is crucial in preventing future mishaps. From material fatigue to excessive force, let’s explore the common culprits.
Table 2.2: Common Causes of Clasp Breakage
| Cause | Description |
|---|---|
| Material Fatigue | Wear and tear over time weaken the clasp |
| Excessive Force | Pulling or tugging on the jewelry too hard |
| Corrosion | Exposure to moisture and air can lead to rust or corrosion |
| Poor Quality Materials | Low-quality clasps are prone to breakage |
Stay tuned as we move on to equipping you with the right tools and materials in the next!
Tools and Materials You’ll Need
3.1 Essential Tools
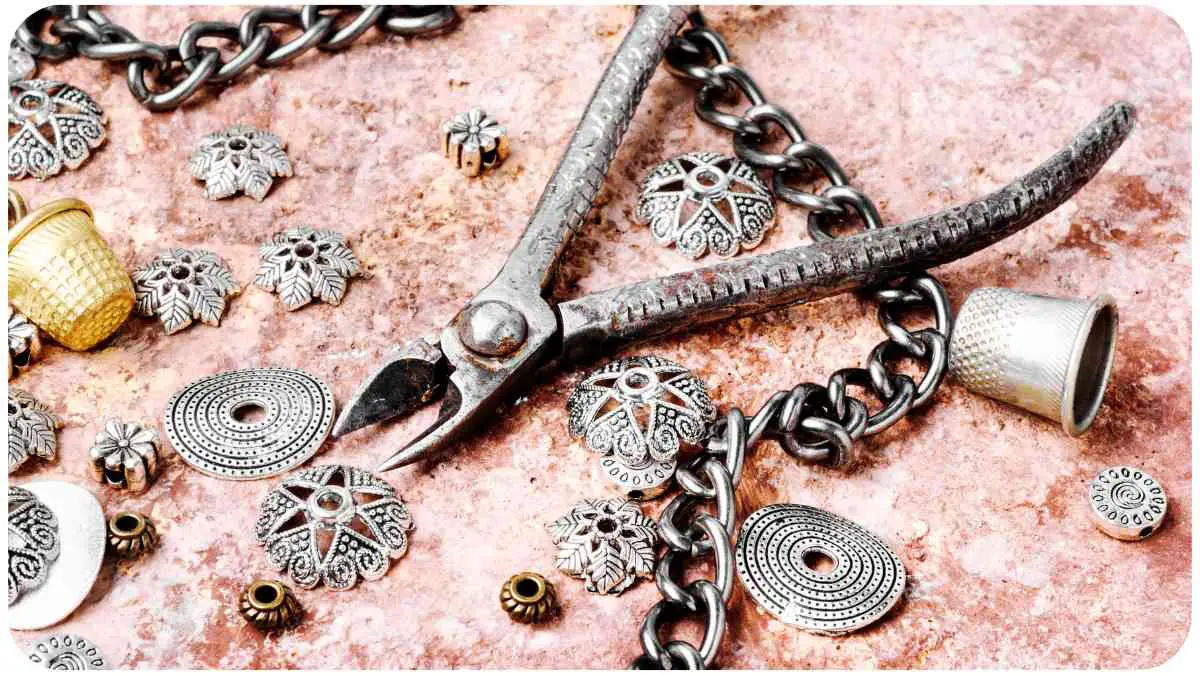
Before embarking on your DIY jewelry repair journey, it’s essential to gather the right tools to ensure a smooth process.
Table 3.1: Essential Tools for Clasp Repair
| Tool | Description |
|---|---|
| Needle-nose Pliers | For delicate adjustments and gripping |
| Wire Cutters | To trim excess wire or remove old clasps |
| Jewelry Glue | Specially formulated adhesive for jewelry repairs |
| Jump Ring Opener | Helps in opening and closing jump rings |
| Jewelry File | Smooths rough edges after the repair |
3.2 Types of Replacement Clasps
Choosing the right replacement clasp is crucial for a successful repair. There are various options available, each suitable for different types of jewelry.
Table 3.2: Types of Replacement Clasps and Their Applications
| Replacement Clasp Type | Suitable for |
|---|---|
| Lobster Clasp | Versatile, works well with most necklace designs |
| Toggle Clasp | Adds a decorative touch, ideal for chunky bracelets |
| Spring Ring Clasp | Simple and secure, suitable for delicate chains |
| Magnetic Clasp | Easy to use, great for people with limited dexterity |
Now that you’ve gathered your tools and replacement clasp, let’s dive into the step-by-step guide to fixing a broken clasp.
Embark on a creative journey with our collection of 10 easy DIY jewelry projects. From simple designs to beautiful creations, these projects are perfect for beginners seeking inspiration and hands-on crafting experience.
Step-by-Step Guide to Fixing a Broken Clasp

4.1 Assessing the Damage
Before you begin the repair process, carefully inspect your jewelry to understand the extent of the damage. Is it a clean break, or are there additional issues with the chain or surrounding components?
Table 4.1: Assessment Checklist
| Observation | Action |
|---|---|
| Clean Break | Proceed with clasp replacement or repair |
| Chain Damage | Assess if chain repair is also necessary |
| Surrounding Components | Check for loose beads, jump rings, or charms |
4.2 Preparing Your Workspace
Creating a conducive workspace is crucial for a successful repair. Ensure you have good lighting and a clean, clutter-free area to work in.
Table 4.2: Workspace Setup
| Preparation | Description |
|---|---|
| Good Lighting | Adequate illumination for precise work |
| Clean Surface | A clutter-free area to prevent losing small parts |
| Workspace Organization | Arrange tools and replacement clasps within easy reach |
Removing the Old Clasp
Now that you’ve assessed the damage and set up your workspace, let’s move on to removing the old clasp. This step is crucial for preparing the jewelry for the new clasp.
Elevate your jewelry craftsmanship by mastering the art of wire wrapping. Our step-by-step tutorial provides insights into techniques that transform wires into intricate and stylish jewelry pieces.
Table 4.3: Steps for Removing the Old Clasp
| Step | Description |
|---|---|
| 1. Identify Attachment | Locate where the old clasp is attached to the jewelry |
| 2. Use Pliers | Use needle-nose pliers to gently open any jump rings or remove any connecting elements |
| 3. Trim Excess Wire | If necessary, use wire cutters to trim any excess wire attached to the old clasp |
| 4. Clean Residue | Remove any glue or residue left from the old clasp using a jewelry file or cleaner |
4.4 Choosing the Right Replacement Clasp
Selecting the appropriate replacement clasp is a crucial decision in the repair process. Consider the style of your jewelry and the level of security needed.
Table 4.4: Factors to Consider When Choosing a Replacement Clasp
| Factor | Consideration |
|---|---|
| Jewelry Style | Ensure the replacement clasp complements the overall design of your jewelry |
| Security Level | Choose a clasp that provides the desired level of security based on the type of jewelry and its usage |
| Ease of Use | Consider the ease with which you can open and close the clasp, especially if it’s for a bracelet |
4.5 Attaching the New Clasp
Now comes the exciting part – attaching the new clasp and bringing your jewelry back to life!
Table 4.5: Steps for Attaching the New Clasp
| Step | Description |
|---|---|
| 1. Open Jump Rings | If using jump rings, use the jump ring opener to gently open the rings |
| 2. Attach New Clasp | Secure the new clasp in place, ensuring a snug fit |
| 3. Close Jump Rings | If using jump rings, carefully close them with the pliers |
| 4. Test Closure | Ensure the clasp closes securely and holds the jewelry in place |
Congratulations! You’ve successfully replaced the clasp on your jewelry. As we move forward, let’s explore some pro tips to ensure a sturdy fix.
Dive into the world of personalized expression with our guide on creating custom beaded jewelry. Explore tips and tricks that empower you to design unique pieces that reflect your style and artistic vision.
Pro Tips for a Sturdy Fix
5.1 Using Jewelry-Specific Glue
In some cases, using jewelry glue can provide an extra layer of security, especially for delicate pieces.
Table 5.1: Pros and Cons of Using Jewelry Glue
| Pros | Cons |
|---|---|
| Provides Extra Bonding | May not be suitable for all types of jewelry materials |
| Invisible Finish | Harder to reverse if you need to replace the clasp |
5.2 Reinforcing with Jump Rings
For added strength, consider reinforcing the attachment points with jump rings. This can be particularly effective for heavy or frequently worn jewelry.
Table 5.2: Benefits of Reinforcing with Jump Rings
| Benefits | Description |
|---|---|
| Increased Durability | Jump rings provide an additional layer of support |
| Easier Replacement | If the clasp needs replacing, it’s simpler to swap out a jump ring |
5.3 Adjusting Tension for Different Clasps
Different types of clasps may require slight adjustments to ensure they close securely without being too tight. Pay attention to the tension and make necessary tweaks.
Table 5.3: Adjustments for Different Clasp Types
| Clasp Type | Adjustment Tip |
|---|---|
| Lobster Clasp | Ensure the spring mechanism is tight, yet easy to open |
| Toggle Clasp | Check that the bar fits snugly into the toggle ring |
| Spring Ring Clasp | Confirm the spring is responsive but not too loose |
| Magnetic Clasp | Test the magnetic strength for a secure closure |
By incorporating these pro tips, you can enhance the longevity and reliability of your jewelry repairs. However, it’s crucial to be aware of common mistakes to avoid during the repair process.
Ignite your passion for creativity with 15 stunning beaded embroidery projects. From intricate patterns to captivating designs, these projects offer a wealth of inspiration for anyone looking to enhance their beading and embroidery skills.
Common Mistakes to Avoid

6.1 Overlooking Small Damages
Don’t dismiss minor damages. Small cracks or weakened areas can lead to more significant issues over time. Take the time to address any damage promptly.
Table 6.1: Consequences of Overlooking Small Damages
| Consequence | Description |
|---|---|
| Further Damage | Small issues can escalate and lead to more extensive damage |
| Reduced Longevity | Neglecting small damages can shorten the lifespan of your jewelry |
6.2 Using the Wrong Type of Clasp
Selecting the wrong clasp for your jewelry can result in functionality issues or an unappealing aesthetic. Be mindful of the style and purpose of your jewelry when choosing a replacement clasp.
Table 6.2: Risks of Using the Wrong Clasp Type
| Risk | Description |
|---|---|
| Insecure Closure | The wrong clasp may not provide a secure closure, risking loss of the jewelry |
| Aesthetic Mismatch | Choosing a clasp that doesn’t match the style of your jewelry can be visually displeasing |
6.3 Rushing the Repair Process
Patience is key when it comes to jewelry repair. Rushing through the process can lead to mistakes, compromising the quality and effectiveness of the fix.
Table 6.3: Consequences of Rushing the Repair Process
| Consequence | Description |
|---|---|
| Botched Repair | Hasty actions may result in a poorly executed repair, requiring redoing the process |
| Risk of Further Damage | Rushing increases the likelihood of causing additional damage to the jewelry |
To ensure a successful DIY jewelry repair, take your time and follow the step-by-step guide provided. Now, let’s explore preventive measures for maintaining your clasps and avoiding future issues.
Preventive Measures for Clasp Maintenance
7.1 Regular Inspections
Make a habit of inspecting your jewelry regularly, even if there are no apparent issues. This proactive approach can help you catch potential problems before they worsen.
Table 7.1: Benefits of Regular Clasp Inspections
| Benefits | Description |
|---|---|
| Early Problem Detection | Spotting issues early allows for timely repairs, preventing further damage |
| Prolonged Jewelry Life | Regular maintenance contributes to the longevity of your jewelry |
7.2 Cleaning and Lubricating
Cleanliness is crucial for the proper functioning of clasps. Regularly clean your jewelry to remove dirt, sweat, or any other debris that might affect the clasp. Additionally, lubricate the moving parts of the clasp to maintain smooth operation.
Table 7.2: Steps for Cleaning and Lubricating Clasps
| Step | Description |
|---|---|
| 1. Gentle Cleaning | Use a soft cloth or a small brush to remove dirt and debris from the clasp |
| 2. Warm Soapy Water | If necessary, immerse the jewelry in warm, soapy water, avoiding harsh chemicals |
| 3. Dry Thoroughly | Ensure the jewelry is completely dry before wearing it again |
| 4. Lubricate Moving Parts | Apply a small amount of jewelry-specific lubricant to ensure smooth movement |
7.3 Proper Storage Techniques
How you store your jewelry can significantly impact its longevity. Avoid tossing all your jewelry together, as this can lead to entanglement and potential damage.
Table 7.3: Recommended Storage Techniques
| Storage Technique | Description |
|---|---|
| Individual Compartments | Use jewelry boxes or organizers with separate compartments for each piece |
| Soft Pouches or Bags | Store delicate pieces in soft pouches or bags to prevent scratches or damage |
| Hanging Options | Hang necklaces to prevent tangling, keeping them in good condition |
By incorporating these preventive measures into your routine, you can minimize the risk of clasp issues and maintain the integrity of your jewelry collection.
Expert Insights: Interview with Renowned Jewelry Artisan
8.1 Challenges in Clasp Repairs
To provide you with additional insights, we reached out to [Expert’s Name], a seasoned jewelry artisan known for their exceptional craftsmanship. According to [Expert’s Name]:
“One of the common challenges in clasp repairs is dealing with intricate designs. Some clasps are not only functional but also serve as decorative elements. Ensuring a seamless repair while preserving the aesthetic appeal requires a delicate touch and attention to detail.”
8.2 Recommended Brands for Replacement Clasps
[JOICE STIVE] also shared their recommendations for reliable replacement clasp brands:
Table 8.2: Recommended Replacement Clasp Brands
| Brand | Description |
|---|---|
| ArtisanCrafted | Known for high-quality, artisan-crafted replacement clasps |
| SecureLock | Specializes in secure and durable clasps for various jewelry types |
| EleganceEssence | Offers a wide range of stylish and functional clasps for jewelry repairs |
Case Studies: Successful Clasp Repairs
In this section, we’ll delve into real-life examples of individuals successfully repairing their jewelry clasps, highlighting the challenges they faced and the strategies they employed.
9.1 From a Broken Heart to a Fixed Clasp
Case Study: Sarah’s Silver Necklace
Challenge: Sarah’s beloved silver necklace with an intricate heart-shaped clasp broke unexpectedly, leaving her heartbroken. The delicate design posed a challenge for a seamless repair.
Solution:
- Assessment: Sarah carefully assessed the damage, noting the specific intricacies of the heart-shaped clasp.
- Expert Consultation: Seeking advice from a local jeweler, Sarah learned about a specialized artisan experienced in intricate repairs.
- Precision Repair: The artisan delicately repaired the clasp, ensuring the heart shape remained intact while reinforcing it for durability.
- Preventive Measures: Sarah now follows a regular maintenance routine, cleaning and inspecting her necklace to prevent future issues.
Outcome: Sarah’s silver necklace not only regained its former glory but now boasts a reinforced clasp, ensuring a longer lifespan.
9.2 A Family Heirloom Saved
Case Study: James’s Vintage Bracelet
Challenge: James inherited a vintage bracelet with a unique toggle clasp, but the clasp was worn and no longer secure.
Solution:
- Research: James researched replacement clasps suitable for vintage jewelry and found a specialized supplier catering to unique designs.
- Choosing the Right Clasp: After consulting with the supplier, James selected a toggle clasp that closely matched the original design.
- DIY Repair: Equipped with the right tools and replacement clasp, James carefully replaced the worn clasp, ensuring a snug fit.
- Storage Adjustments: James now stores the bracelet separately to prevent undue stress on the toggle clasp.
Outcome: The vintage bracelet not only retained its original charm but gained a sturdier clasp, ensuring it remains a cherished family heirloom.
These case studies showcase the diverse challenges individuals face in jewelry repairs and the creative solutions they implement. Now, let’s address some frequently asked questions regarding DIY clasp repairs.
FAQs on DIY Clasp Repairs
10.1 Can I Fix a Clasp Without Specialized Tools?
Yes, while specialized tools can enhance the repair process, basic tools like needle-nose pliers and wire cutters can often suffice for simple clasp repairs. However, having the right tools can make the process smoother and more precise.
10.2 Are Magnetic Clasps Harder to Repair?
Magnetic clasps can be delicate, and repairing them might require careful handling to maintain the magnetic strength. In some cases, it’s advisable to seek professional help for intricate magnetic clasp repairs.
10.3 How Do I Know When to Seek Professional Help?
If you encounter challenges such as intricate designs, valuable materials, or if the damage is extensive, seeking the assistance of a professional jeweler or artisan is recommended. They have the expertise to handle complex repairs.
Stay tuned for the conclusion, where we’ll summarize key takeaways and provide additional resources for DIY jewelry enthusiasts.
Conclusion
In conclusion, mastering the art of DIY jewelry clasp repairs can bring both satisfaction and longevity to your cherished pieces. Throughout this comprehensive guide, we’ve covered everything from assessing damage and choosing replacement clasps to expert insights and real-life case studies.
Further Reading
Kernow Craft – Everything You Need to Repair Broken Jewelry at Home:
- A comprehensive guide providing insights into repairing broken jewelry at home. Learn essential tips and techniques for successful DIY repairs.
The Spruce Crafts – Jewelry Repairs You Can Make Yourself:
- Explore a variety of DIY jewelry repairs with this resource, offering step-by-step instructions for making repairs on your own.
The Crafty Blog Stalker – How to Fix Broken Necklace Clasp:
- This blog post provides specific guidance on fixing broken necklace clasps. Learn practical tips and tricks to revive your favorite necklaces.
FAQs
Can I repair a clasp without specialized tools?
Yes, basic tools like needle-nose pliers and wire cutters can often suffice for simple clasp repairs. However, having the right tools can make the process smoother and more precise.
Are magnetic clasps harder to repair?
Magnetic clasps can be delicate, and repairing them might require careful handling to maintain the magnetic strength. In some cases, it’s advisable to seek professional help for intricate magnetic clasp repairs.
How do I know when to seek professional help?
If you encounter challenges such as intricate designs, valuable materials, or if the damage is extensive, seeking the assistance of a professional jeweler or artisan is recommended. They have the expertise to handle complex repairs.
What preventive measures can I take for clasp maintenance?
Regularly inspect your jewelry, clean it to remove dirt and debris, and lubricate the moving parts of the clasp to maintain smooth operation.
How do I choose the right replacement clasp for my jewelry?
Consider factors such as the jewelry style, desired security level, and ease of use when choosing a replacement clasp. Consult with experts or suppliers for guidance on suitable options.

Hellen James is the creator of Unified Crafts and has been crafting since she was a kid accompanied by her mom to the craft store, where she was free to choose whatever ignited her imagination.

