Stained glass art has a timeless allure that captures the imagination. If you’re a beginner crafter eager to dive into this fascinating world, you’re in for a treat!
This article will guide you through the essential stained glass techniques, from selecting materials to troubleshooting common issues. Join me on this creative journey, and let’s unlock the secrets of stunning stained glass art.
| Takeaways |
|---|
| 1. Stained glass art is an ancient and timeless craft. |
| 2. Beginners should start with a simple design to build confidence. |
| 3. Essential tools include glass cutter, soldering iron, and safety gear. |
| 4. Explore various types of stained glass for different effects. |
| 5. Techniques include cutting glass, foiling, soldering, and adding decorative elements. |
| 6. Troubleshoot issues like uneven solder lines and cracked glass with practical tips. |
| 7. Advanced techniques include glass painting, glass fusing, and leaded glass. |
| 8. Care for your stained glass art with proper cleaning, storage, and display. |
| 9. Gain inspiration from expert crafters and notable stained glass creations. |
| 10. Embrace the learning process and let your imagination guide your creations. |
2. Getting Started with Stained Glass

2.1 Understanding Stained Glass Art
Stained glass is more than just a craft; it’s an art form that dates back centuries. To embark on this journey, familiarize yourself with the history and significance of stained glass. Understanding the principles behind this art will enrich your creative process.
Unlock the world of stained glass art with “essential tips and techniques” Ultimate Guide. Elevate your craft and create stunning pieces that reflect your creativity.
2.2 Essential Tools and Materials
Before you start crafting, gather the necessary tools and materials. Create a dedicated workspace equipped with glass cutters, soldering irons, and safety gear. A well-prepared workspace ensures a smooth and enjoyable crafting experience.
Table 2.2.1: Essential Tools and Materials
| Tool/Material | Purpose |
|---|---|
| Glass Cutter | Cutting stained glass sheets |
| Soldering Iron | Joining glass pieces with solder |
| Safety Glasses | Protecting eyes from glass shards |
| Grinder | Smoothing rough edges of cut glass |
| Foil and Flux | Preparing glass edges for soldering |
| Stained Glass Sheets | Variety of colors and textures for designs |
| Pattern and Templates | Guiding your design and cutting shapes |
2.3 Setting Up Your Workspace
Creating stained glass art requires a dedicated and organized workspace. Set up a comfortable area with good lighting, ventilation, and all your tools within reach. A well-organized workspace enhances creativity and minimizes distractions.
Embark on a creative journey with our in-depth guide to “glass art techniques” Creative Techniques. Discover a world of possibilities as you explore and implement various techniques in your stained glass projects.
Table 2.3.1: Workspace Essentials
| Workspace Element | Importance |
|---|---|
| Adequate Lighting | Precise cutting and detailed work |
| Ventilation | Safety from fumes during soldering |
| Comfortable Seating | Extended crafting sessions |
| Organized Tool Rack | Easy access to essential tools |
| Large Work Surface | Layout of glass pieces and designs |
3. Selecting the Right Glass
3.1 Types of Stained Glass
Understanding the types of stained glass available is crucial for your projects. Stained glass comes in various forms, including cathedral, opalescent, and textured. Each type offers unique characteristics, adding depth and dimension to your creations.
Table 3.1.1: Types of Stained Glass
| Type | Characteristics |
|---|---|
| Cathedral | Transparent and allows light to pass through |
| Opalescent | Opaque with a milky appearance |
| Textured | Various surface patterns for added visual interest |
| Iridescent | Shimmering and reflective qualities |
3.2 Colors and Textures
Choosing the right colors and textures is where your creativity shines. Experiment with a variety of hues and textures to add visual interest to your stained glass art. Consider the emotion or atmosphere you want to convey in your piece.
Delve into the world of stained glass crafting with our “comprehensive beginner’s guide” Beginner’s Guide. Unlock the secrets of this timeless art form and start your journey towards creating beautiful stained glass masterpieces.
Table 3.2.1: Color and Texture Palette
| Color | Emotion/Effect |
|---|---|
| Red | Passion, warmth |
| Blue | Tranquility, serenity |
| Green | Nature, balance |
| Amber | Earthiness, vintage feel |
| Textured | Depth, complexity |
3.3 Tools for Cutting Glass
Achieving precise cuts is essential for a polished stained glass piece. Familiarize yourself with the tools designed for cutting glass, ensuring you have the right equipment for a smooth crafting process.
Table 3.3.1: Glass Cutting Tools
| Tool | Description |
|---|---|
| Glass Cutter | Scores the glass for controlled breaks |
| Running Pliers | Grips and breaks glass along the score line |
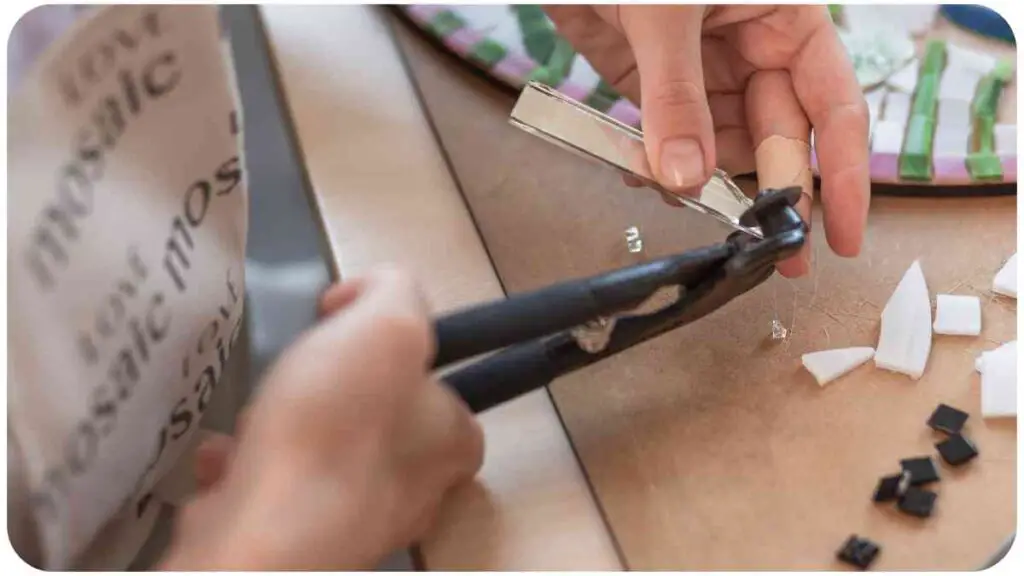
| Grozing Pliers | Removes small pieces and shapes glass edges |
| Circle Cutter | Creates perfect circles in stained glass |
| Straight Edge | Ensures straight and precise cuts |
4. Basic Stained Glass Techniques

4.1 Cutting Glass Shapes
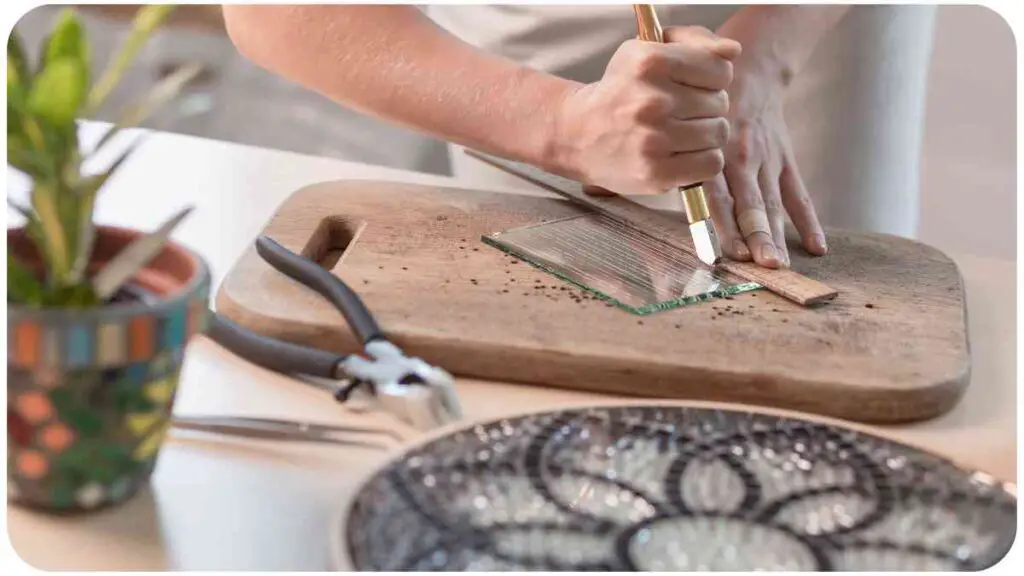
Now that you’re equipped with the right tools, let’s dive into the first technique: cutting glass shapes. Practice scoring and breaking glass along the lines, ensuring smooth edges for your stained glass pieces.
4.2 Foiling and Soldering
Foiling and soldering are fundamental techniques that bring your glass pieces together. Apply copper foil to the edges of each piece, creating a surface for solder to adhere to. Soldering then bonds the foiled pieces, forming a sturdy and beautiful composition.
Discover the essential techniques for crafting beautiful art with glass in our guide on glass crafting. Explore fundamental skills that will empower beginners to create stunning stained glass artworks.
Table 4.2.1: Foiling and Soldering Essentials
| Tool/Material | Purpose |
|---|---|
| Copper Foil | Wraps around the glass edges for soldering |
| Soldering Iron | Melts solder to join foiled glass pieces |
| Flux | Enhances solder flow and adhesion |
| Solder | Fuses foiled pieces together |
| Flux Brush | Applies flux to the foiled edges |
4.3 Adding Decorative Elements
Elevate your stained glass art by incorporating decorative elements. Consider using bevels, jewels, or wire to enhance your design. These additions add a touch of sophistication and uniqueness to your creations.
Table 4.3.1: Decorative Elements
| Element | Purpose |
|---|---|
| Bevels | Angled glass pieces for added dimension |
| Jewels | Colored glass accents for visual interest |
| Wire | Intricate lines and details in the design |
| Glass Paint | Customizing and adding details to the glass |
4.4 Patina and Finishing Touches
Once your stained glass masterpiece is complete, it’s time for the finishing touches. Apply patina to the solder lines to create a cohesive look and enhance the overall appearance of your creation.
Table 4.4.1: Finishing Touches
| Material | Purpose |
|---|---|
| Patina | Adds color to solder lines, creating a uniform look |
| Polishing Compound | Buffs and shines the finished stained glass |
| Cleaning Cloth | Removes any residue and fingerprints |
| Display Hooks | Attaches to the stained glass for hanging |
5. Design Tips for Beginners
5.1 Choosing a Simple Design
As a beginner, start with a simple design to build your confidence. Select a pattern with basic shapes and fewer intricate details. This approach allows you to focus on mastering the techniques without feeling overwhelmed.
Embark on your stained glass crafting journey with our “step-by-step tutorial” Step-by-Step Tutorial. Learn the basics and create your first masterpiece with confidence, turning glass into a canvas for your artistic expression.
5.2 Incorporating Different Shapes
Experiment with various shapes to add visual interest to your stained glass art. Combine circles, squares, and rectangles to create dynamic compositions. Playing with shape combinations allows you to express your creativity and develop a unique style.
Table 5.2.1: Shape Combinations
| Shape Combination | Visual Effect |
|---|---|
| Circles and Curves | Soft, organic feel |
| Squares and Lines | Geometric and structured |
| Random Mix | Playful and eclectic |
| Symmetrical Patterns | Classic and balanced |
5.3 Creating a Balanced Composition
Achieving balance in your design is key to creating visually appealing stained glass art. Distribute visual weight evenly across your piece, ensuring no area feels overloaded or empty. Consider symmetry, color distribution, and element placement for a harmonious composition.
Table 5.3.1: Balancing Design Elements
| Element Placement | Tips for Achieving Balance |
|---|---|
| Symmetry | Create mirrored elements for balance |
| Color Distribution | Distribute colors evenly throughout |
| Focal Point | Choose a central point of interest |
| Negative Space | Utilize empty spaces for visual balance |
5.4 Using Templates and Patterns
Templates and patterns are invaluable tools for beginners. They provide a roadmap for your design, helping you stay on track and achieve the desired outcome. Invest time in finding or creating patterns that align with your artistic vision.
Table 5.4.1: Template and Pattern Resources
| Resource | Description |
|---|---|
| Online Patterns | Websites offering a variety of downloadable patterns |
| Craft Books | Books with stained glass patterns and templates |
| Design Software | Digital tools for creating custom patterns |
| Local Workshops | In-person classes for hands-on guidance |
6. Troubleshooting Common Issues
6.1 Uneven Solder Lines
If you encounter uneven solder lines in your stained glass piece, don’t worry. Uneven lines are a common issue for beginners. To remedy this, ensure your soldering iron is at the right temperature, and practice maintaining a steady hand as you work.
6.2 Foiling Challenges
Working with copper foil can present challenges, such as improper adhesion or wrinkles. To address foiling issues, make sure the glass is clean and dry before applying foil. Use a burnisher or fid to smooth out the foil, ensuring it adheres securely to the glass.
Table 6.2.1: Foiling Tips
| Foiling Challenge | Troubleshooting Tips |
|---|---|
| Improper Adhesion | Clean and dry the glass thoroughly before applying foil |
| Wrinkles in Foil | Use a burnisher or fid to smooth out wrinkles |
6.3 Dealing with Cracked Glass
Cracked glass can be disheartening, but it’s a common issue, especially during cutting. To minimize the risk of cracks, ensure your glass cutter is sharp, and apply consistent pressure while scoring. If a crack occurs, consider adjusting your cutting technique and practice on scrap glass.
Table 6.3.1: Preventing Cracked Glass
| Issue | Prevention Tips |
|---|---|
| Cracked Glass | Use a sharp glass cutter with consistent pressure |
| Adjust Cutting Technique | Practice cutting on scrap glass before starting your project |
6.4 Preventing Copper Patina Issues
Over time, copper patina can develop on your stained glass, affecting its appearance. To prevent unwanted patina, clean your finished piece thoroughly, removing any flux residue. Applying a clear protective finish can also help preserve the original look of your stained glass art.
Table 6.4.1: Copper Patina Prevention
| Issue | Prevention Tips |
|---|---|
| Copper Patina Formation | Thoroughly clean the finished piece, removing flux residue |
| Clear Protective Finish | Apply a clear protective finish to prevent patina |
7. Advanced Techniques to Explore
7.1 Glass Painting and Staining

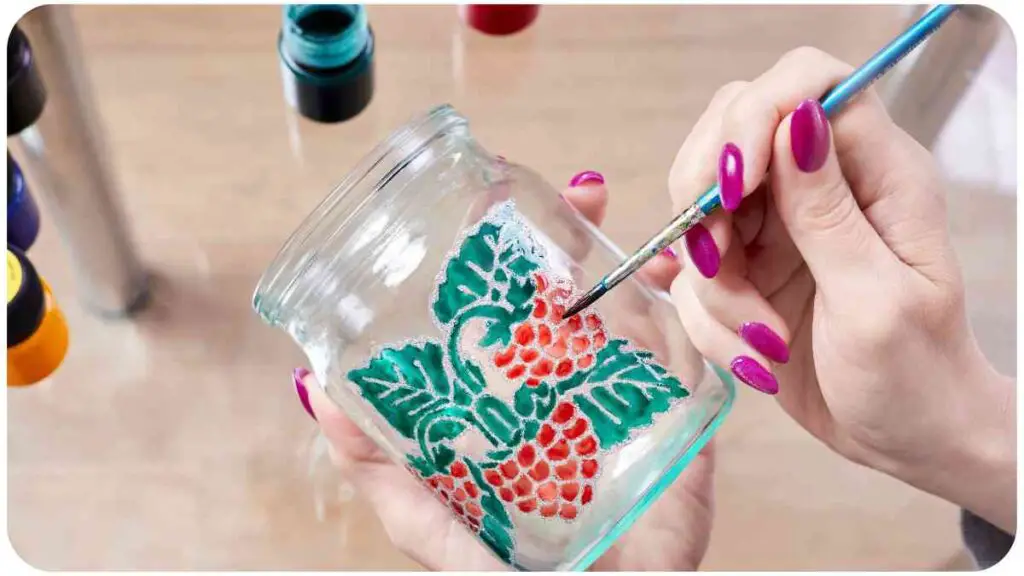
Take your stained glass art to the next level by exploring glass painting and staining techniques. These methods allow you to add intricate details, shading, and a broader color palette to your creations. Experiment with transparent and opaque paints to achieve different effects.
Table 7.1.1: Glass Painting and Staining Supplies
| Supply | Purpose |
|---|---|
| Glass Paints | Transparent and opaque colors for detailing |
| Liner Brushes | Fine brushes for intricate painting |
| Glass Staining Medium | Enhances paint adhesion to glass |
| Glass Cleaner | Removes any residue before painting |
7.2 Glass Fusing
Venture into the fascinating world of glass fusing, where pieces of glass are melted together to create unique shapes and textures. This technique allows for the creation of three-dimensional pieces and opens up a new realm of artistic possibilities.
Table 7.2.1: Glass Fusing Essentials
| Essential | Purpose |
|---|---|
| Kiln | Used to heat and fuse glass pieces together |
| Kiln Shelf | Supports glass pieces during the fusing process |
| Compatible Glass | Glass pieces that can be fused together |
| Kiln Wash | Prevents glass from sticking to the kiln shelf |
7.3 Leaded Glass Techniques
Explore the traditional art of leaded glass, where pieces of glass are held together with lead came. Leaded glass techniques offer a different aesthetic and provide opportunities for intricate designs and detailed craftsmanship.
Table 7.3.1: Leaded Glass Techniques
| Technique | Description |
|---|---|
| Lead Came | Strips of lead used to hold glass pieces together |
| Soldering Iron | Joins lead came and secures glass pieces |
| Patina | Applied to lead to achieve a uniform appearance |
7.4 3D Stained Glass Projects
For those seeking a more sculptural approach, 3D stained glass projects are a fantastic option. Create lampshades, vases, or even sculptures using stained glass techniques, adding a new dimension to your artistic endeavors.
Table 7.4.1: Materials for 3D Stained Glass Projects
| Material | Purpose |
|---|---|
| Copper Foil Tape | Joins 3D glass pieces securely |
| Soldering Iron | Bonds foil tape and creates structural support |
| Reinforcement Bars | Adds stability to 3D glass structures |
8. Caring for Your Stained Glass Art
8.1 Cleaning and Maintenance
Preserving the beauty of your stained glass art requires proper cleaning and maintenance. Regularly dust the surface with a soft brush or microfiber cloth to prevent buildup. For more thorough cleaning, use a mild glass cleaner, ensuring it does not contain ammonia, which can damage solder and patina.
Table 8.1.1: Cleaning and Maintenance Tips
| Tip | Description |
|---|---|
| Gentle Dusting | Regularly dust with a soft brush or microfiber cloth |
| Mild Glass Cleaner | Use a gentle glass cleaner for more thorough cleaning |
| Avoid Ammonia | Choose cleaners without ammonia to protect solder and patina |
8.2 Proper Storage
When storing your stained glass art, take precautions to prevent damage. Wrap each piece in acid-free tissue paper or bubble wrap to protect against scratches and breakage. Store the pieces vertically in a sturdy box, ensuring they won’t shift during storage.
Table 8.2.1: Storing Stained Glass Art
| Storage Tip | Description |
|---|---|
| Acid-Free Tissue Paper | Wrap each piece to prevent scratches |
| Bubble Wrap | Additional protection against breakage |
| Vertical Storage | Store pieces upright to avoid shifting during storage |
8.3 Displaying Your Creations
Showcasing your stained glass art is a rewarding experience. Whether hanging your piece or placing it in a stand, consider the environment. Avoid direct sunlight, extreme temperatures, and high humidity, as these factors can impact the longevity of your artwork.
Table 8.3.1: Displaying Tips
| Display Tip | Description |
|---|---|
| Hanging Hardware | Use appropriate hooks or wires for hanging |
| Display Stands | Choose stands that support the weight and size of your piece |
| Controlled Environment | Avoid direct sunlight, extreme temperatures, and high humidity |
9. Inspiration from Expert Crafters
9.1 Interviews with Stained Glass Artists
Gain insights and inspiration from seasoned stained glass artists through exclusive interviews. Learn about their creative process, challenges, and triumphs in the world of stained glass art.
Table 9.1.1: Featured Stained Glass Artists
| Artist | Interview Highlights |
|---|---|
| Maya Thompson | Emphasizes storytelling through intricate glass designs |
| Jonathan Chen | Specializes in blending modern and traditional techniques |
| Elena Rodriguez | Shares tips for incorporating cultural influences |
| David Harper | Discusses the evolution of stained glass in contemporary art |
9.2 Showcasing Notable Creations
Explore the work of renowned stained glass artists to ignite your creative spark. Witness the diversity of styles, techniques, and themes that artists bring to this captivating medium.
Table 9.2.1: Notable Stained Glass Creations
| Artist | Notable Creations |
|---|---|
| Tiffany Studios | Iconic stained glass lamps and windows |
| Judith Schaechter | Intricately detailed narrative stained glass panels |
| Louis Comfort Tiffany | Stained glass masterpieces, including the Tiffany Dome |
| Kehinde Wiley | Contemporary artist incorporating stained glass in public art |
10. Conclusion
Embarking on the journey of stained glass art as a beginner crafter opens up a world of creativity and self-expression. From mastering basic techniques to exploring advanced methods, the possibilities are endless.
Remember to embrace the learning process, seek inspiration from experts, and let your imagination guide your stained glass creations.
Now, armed with the knowledge of essential techniques, design tips, and troubleshooting strategies, you’re ready to unleash your artistic potential in the captivating realm of stained glass art. Happy crafting!
Further Reading
- A Beginner’s Guide to Stained Glass: Explore this comprehensive guide on KinderArt for beginners delving into the art of stained glass. Learn essential techniques, materials, and tips to kickstart your stained glass crafting journey.
- Getting Started with Stained Glass: The Handmade Home provides valuable insights for those taking their first steps in stained glass. Discover practical advice on setting up your workspace, selecting materials, and getting hands-on with this creative craft.
- How To Faux Stained Glass Painting: Dive into the world of faux stained glass painting with this tutorial on FeltMagnet. Learn techniques to mimic the beauty of stained glass without the complexity of traditional methods.
FAQs
How do I get started with stained glass art?
To begin your stained glass journey, start by understanding the basics of the craft, including essential tools, materials, and workspace setup. Explore beginner-friendly guides to build a solid foundation.
What types of glass are suitable for stained glass projects?
Various types of stained glass, such as cathedral, opalescent, and textured, offer unique characteristics. Consider the transparency, color, and texture of the glass based on your artistic vision for the project.
What are common issues in stained glass crafting, and how can I troubleshoot them?
Common issues include uneven solder lines, foiling challenges, cracked glass, and copper patina formation. Refer to troubleshooting tables in the article for tips on addressing these challenges effectively.
Are there advanced techniques I can explore in stained glass art?
Absolutely! Advanced techniques include glass painting and staining, glass fusing, leaded glass techniques, and 3D stained glass projects. These techniques open up new possibilities for creativity and artistic expression.
How should I care for and display my finished stained glass art?
Proper cleaning, maintenance, and storage are crucial for preserving the beauty of your stained glass art. Additionally, choose suitable hanging hardware or display stands, and avoid exposing your creations to direct sunlight or extreme environmental conditions.

Hellen James is the creator of Unified Crafts and has been crafting since she was a kid accompanied by her mom to the craft store, where she was free to choose whatever ignited her imagination.

